Introduction
Version: 1.3.0
Author: Faisal Safadi
Welcome to Eyelit! Thank you for choosing our theme. Eyelit is not just an e-commerce theme; it’s a complete, specialized solution designed for creating and selling unique, personalized iris artwork. This comprehensive documentation will guide you through every step, from installation to launching your unique online store.
Key Features:
- Fully Self-Hosted: All assets, including Google Fonts, are bundled with the theme. No external calls to Google or other CDNs for faster loading and improved privacy.
- Full RTL Support: The theme includes a dedicated stylesheet for right-to-left languages like Arabic and Hebrew, ensuring a perfectly mirrored layout.
Important Note About Demo Content
Please be aware that the images, sliders, and some specific content (like pre-made “Styles”) visible in our live demo are for demonstration purposes only. Due to copyright and licensing restrictions, they are **not included** in the theme package.
On a fresh installation, you will see gray placeholder images. **This is normal and your theme is not broken.** Your site will look stunning as soon as you add your own content. We highly recommend using the One Click Demo Import feature to get the same structure as our demo.
What’s in the Download Package?
When you extract the main package from the marketplace, you’ll find a well-organized structure:
eyelit.zip– This is the main theme file you will install into WordPress.eyelit-child.zip– A pre-configured child theme. We strongly recommend using it for any code customizations.Documentation/– This folder contains:- This documentation file (
documentation.html). - Slider – The demo slider file for manual import
into Smart Slider 3.
eyelit-homepage-slider-1.ss3
eyelit-homepage-slider-2.ss3
eyelit-homepage-slider-3.ss3
- README.txt
- This documentation file (
System Requirements
Eyelit is a powerful theme designed for high-resolution media. To ensure a flawless experience, especially during demo import and for your customers uploading their photos, your hosting environment must meet these minimum requirements.
Core Requirements:
- WordPress Version: 6.0 or higher
- PHP Version: 7.4 or higher
Essential PHP Configuration Limits:
These settings directly impact the maximum file size your customers can upload and the stability of the demo import process.
upload_max_filesize = 64M— **This is the maximum size for a single iris photo a customer can upload.**post_max_size = 64M— Must be equal to or greater than the upload max size.memory_limit = 256M(512M recommended for sites with high traffic)max_execution_time = 300(seconds)
Is 64MB enough for customer photos?
Yes, absolutely. A high-quality photo from a modern smartphone or professional camera is typically between 5MB and 20MB. A 64MB limit is very generous and ensures that almost all your customers can upload their images without issues, while also protecting your server from excessively large files.
We recommend informing your customers of this limit on the product page.
How to Increase Your PHP Limits
If you encounter issues, the easiest way is to **contact your hosting provider** and ask them to set the values listed above. For advanced users, you can try editing your php.ini or .htaccess file.
Installation Flow (5 Steps)
Follow these five steps in order to replicate the demo site perfectly. The entire process is designed to be completed in under 15 minutes.
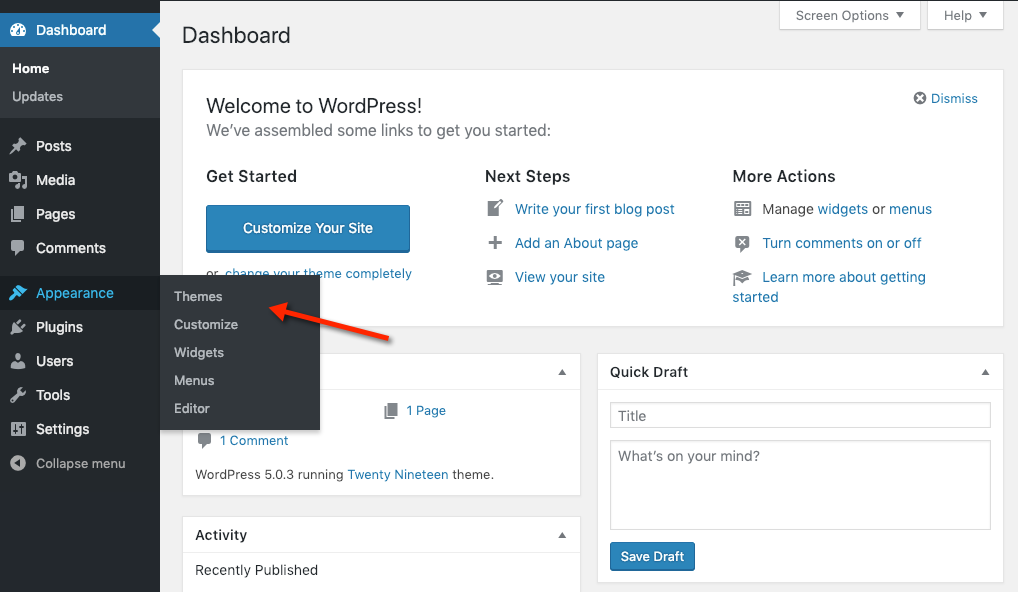
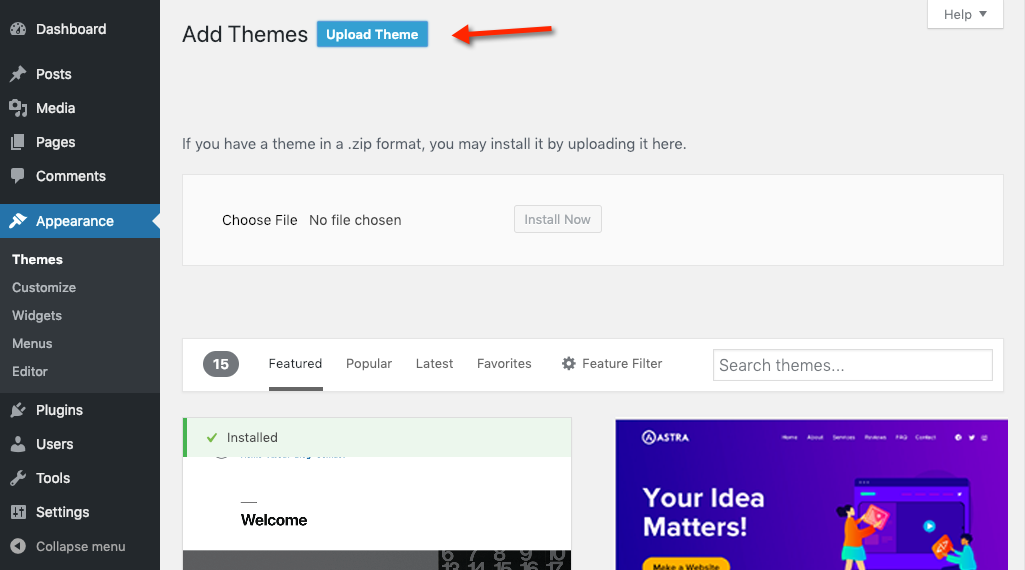
Step 1: Install the Theme
- In your WordPress Dashboard, go to Appearance > Themes > Add New > Upload Theme.
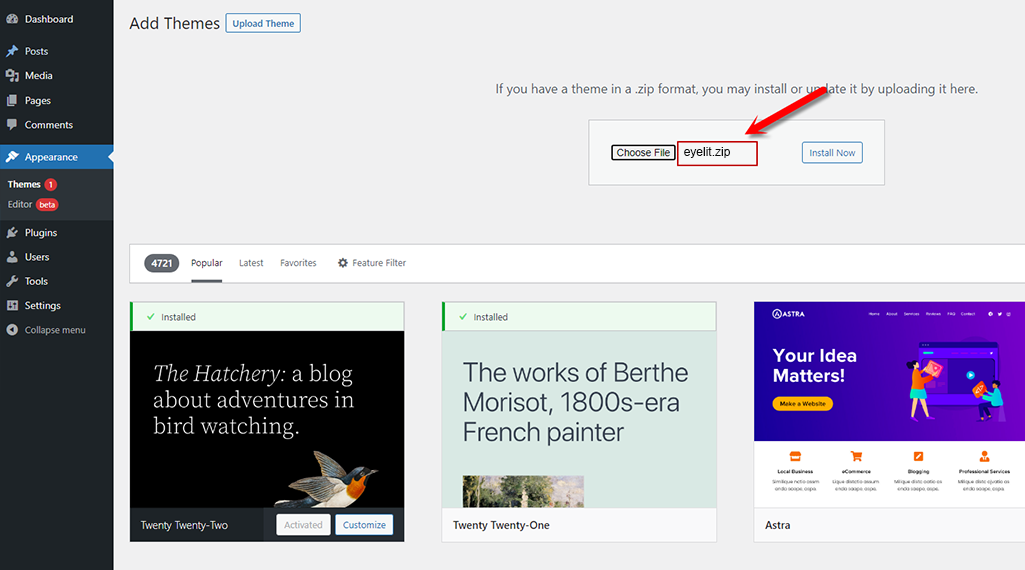
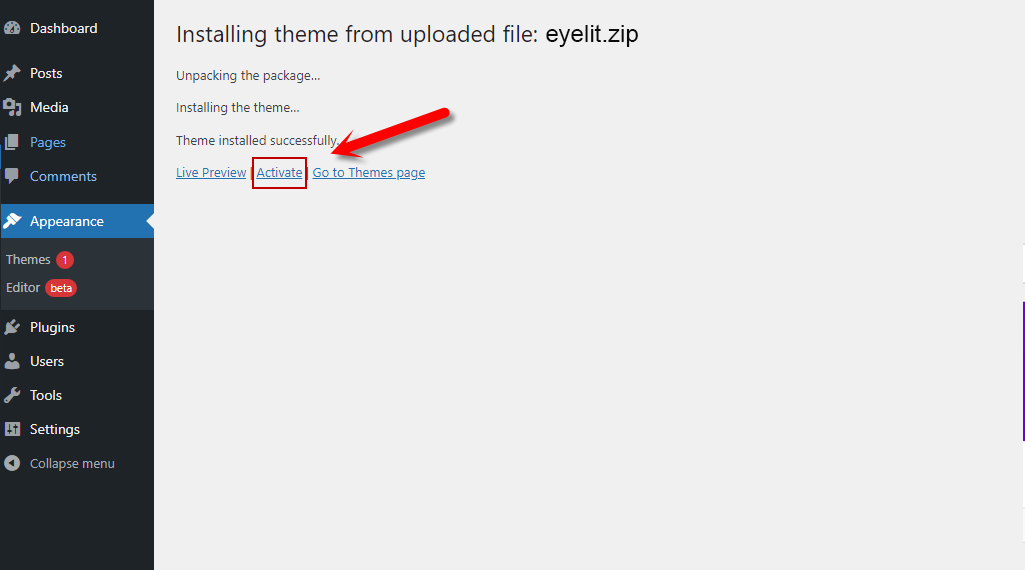
- Upload the
eyelit.zipfile and activate it.
Step 2: Install & Activate Required Plugins
After activating the theme, a notification will appear at the top of your screen prompting you to install the plugins that power Eyelit. For a stable and error-free setup, we recommend installing and activating them in a specific order.
Please follow this order carefully. Activating plugins that depend on WooCommerce before WooCommerce itself is installed can cause issues.
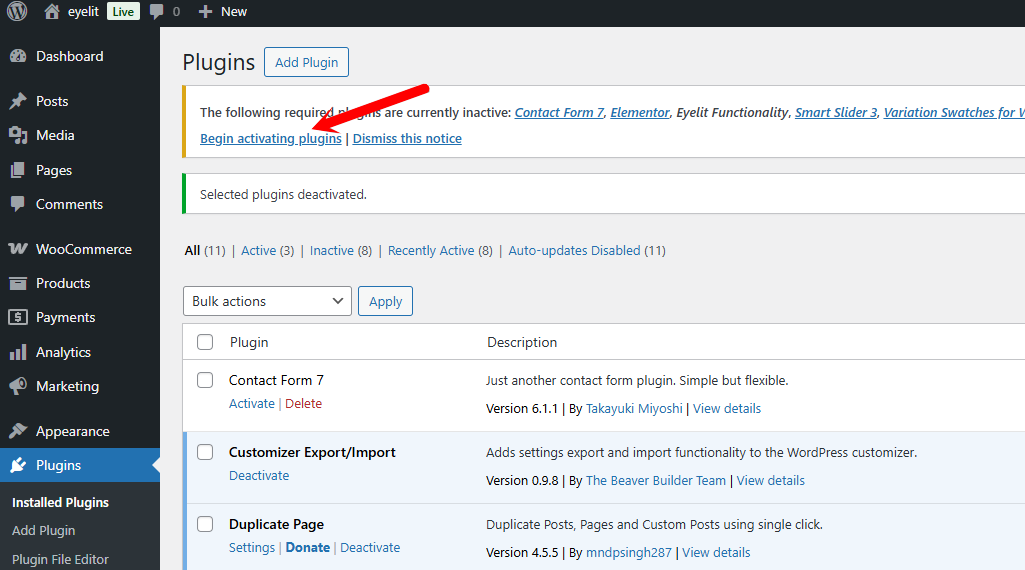
In the notification at the top of your screen, click the “Begin installing plugins” link. You will be taken to the plugin installation screen.
1. Install Core Plugins
First, we will install the main plugins. Do not use the “Bulk Actions” yet.
- Find Eyelit Functionality in the list and click its “Install” link.
- Find Elementor and click its “Install” link.
- Find WooCommerce and click its “Install” link.
- Find Smart Slider 3 and click its “Install” link.
- Find Contact Form 7 and click its “Install” link.
2. Install WooCommerce Add-ons
Now that WooCommerce is installed, we can safely install the plugins that depend on it.
- Find Variation Swatches for WooCommerce and click its “Install” link.
- Find YITH WooCommerce Wishlist and click its “Install” link.
3. Activate All Plugins
Once all plugins are installed, we can activate them all at once.
- Click the “Return to Required Plugins Installer” link at the bottom or top of the page.
- Check the box at the top of the list to select all plugins.
- From the “Bulk Actions” dropdown menu, select Activate.
- Click the Apply button.
After activating WooCommerce, it may prompt you to run its setup wizard. You can skip this for now, as the demo import process will configure the necessary settings for you.
Plugin Overview:
- Eyelit FunctionalityRequired – Adds your “Eyelit Styles” post type, Elementor widgets, and other core features.
- ElementorRequired – The page builder used to create all the layouts.
- WooCommerceRequired – Powers all e-commerce functionality.
- Smart Slider 3Required – Used for the stunning hero sliders.
- Variation Swatches for WooCommerceRequired – Enhances product options with color swatches.
- YITH WooCommerce WishlistRequired – Enables the wishlist feature.
- Contact Form 7Required – Used for the newsletter and contact forms.
- One Click Demo ImportRecommended – As explained in the next step, you will install this plugin manually to import the demo.
Step 3: Import the Demo Content
This step will make your site look exactly like our live demo by importing all pages, products, settings, and the crucial Elementor Kit which styles your entire site.
Important: To perform this step, you first need to manually install the “One Click Demo Import” plugin.
3.1 – Install the Demo Import Plugin
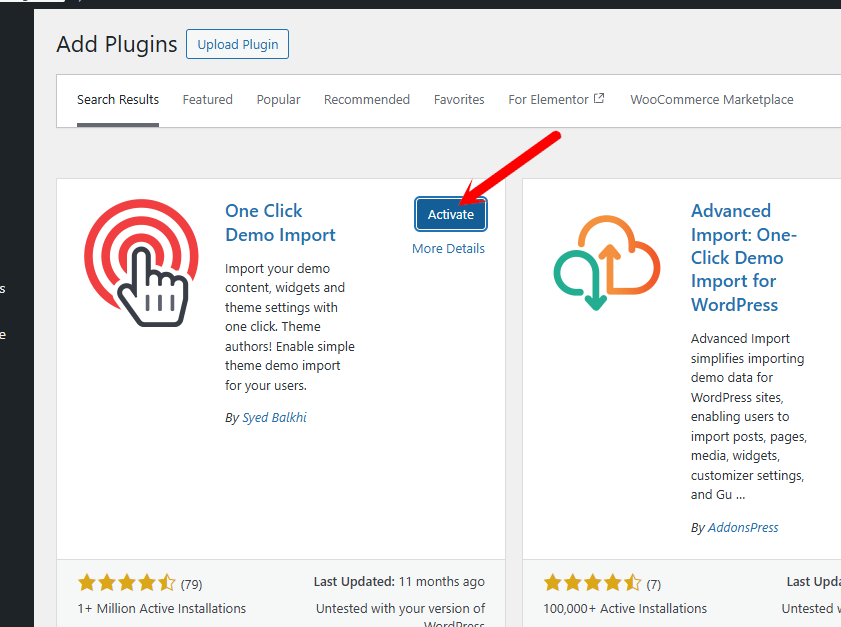
- In your WordPress Dashboard, go to Plugins > Add New.
- In the search bar, type “One Click Demo Import”.
- Find the plugin by OCDI team in the search results and click “Install Now”, then “Activate”.
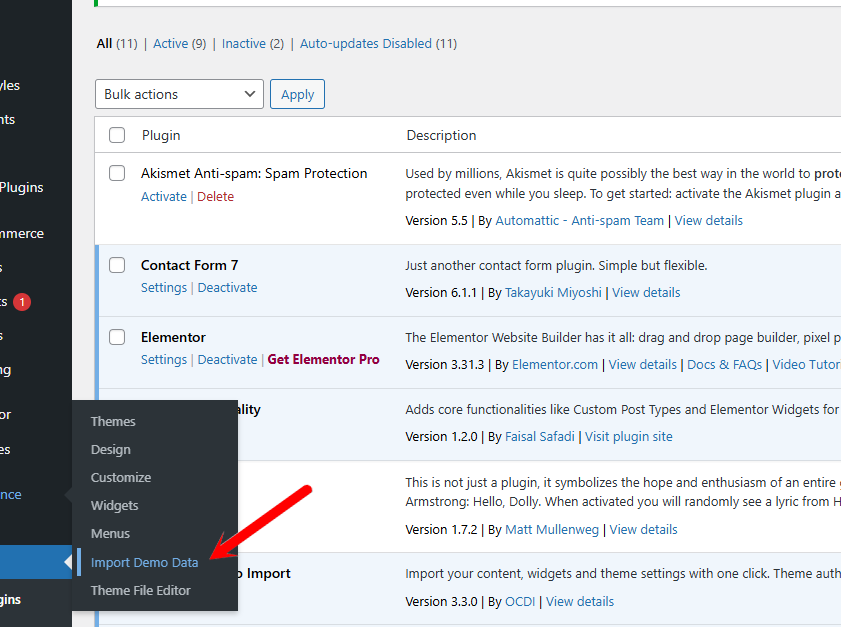
Once the plugin is active, a new menu item will appear under “Appearance”.
3.2 – Run the Importer
- Now, navigate to Appearance > Import Demo Data.
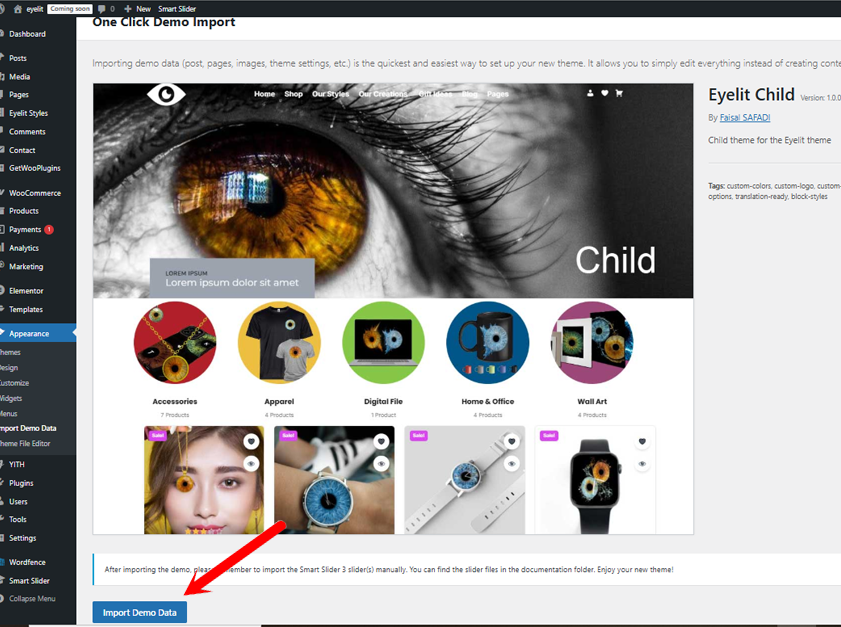
- You will see the Eyelit demo available. Click the main “Import Demo” button.
- A confirmation window will appear. Please be patient, as this can take several minutes. **Do not close or refresh the page** until you see the success message.

Step 4: Import the Homepage Slider
Due to plugin limitations, the homepage slider must be imported manually.
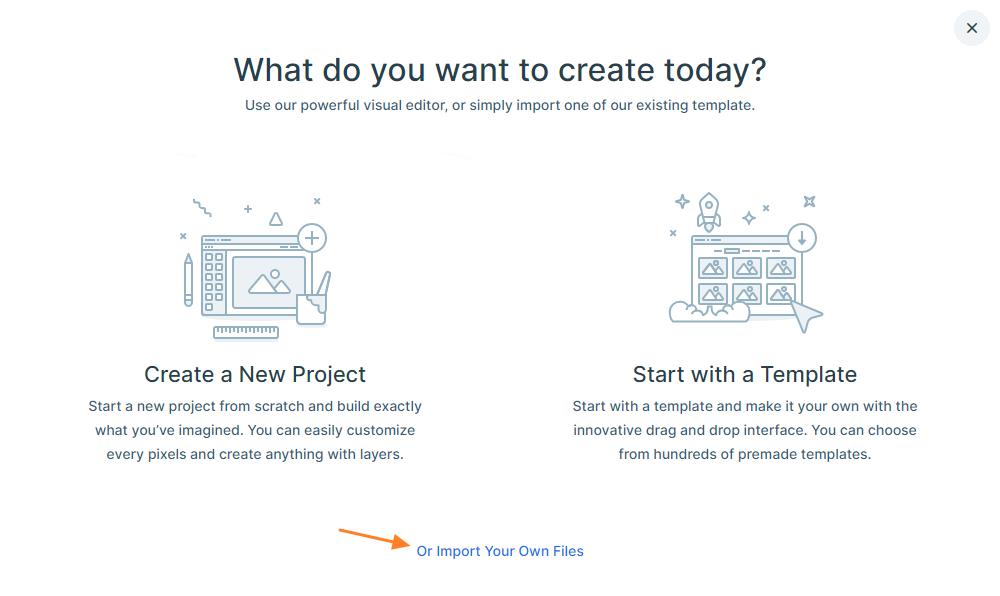
- In your WordPress dashboard, go to the Smart Slider 3 menu.
- From the Dashboard you can import a slider if you click on the New Project button and click on the “Or Import Your Own Files” link.
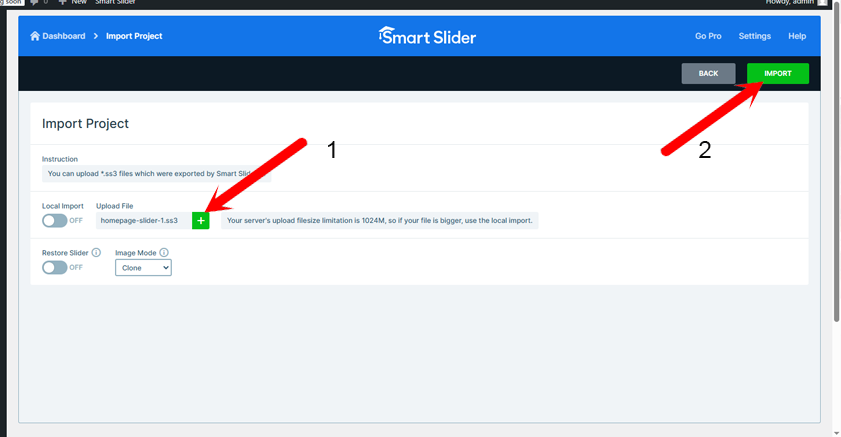
- Select your slider files from the
Documentation/Sliderfolder, then click on the Import button. - Repeat
homepage-slider-1.ss3homepage-slider-2.ss3andhomepage-slider-3.ss3.
Step 5: Finalize the Setup
- Update Permalinks: Go to Settings > Permalinks and simply click “Save Changes” once. This prevents “404 Not Found” errors on your new pages.
- Clean-up (Optional): You can now go to **Plugins** and **Deactivate** and **Delete** the “One Click Demo Import” plugin. It is no longer needed.
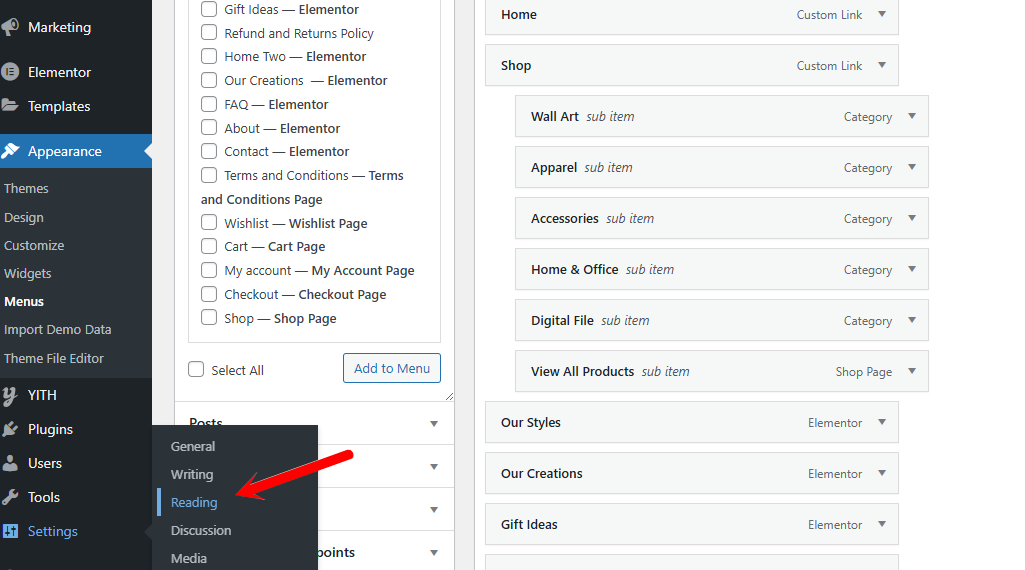
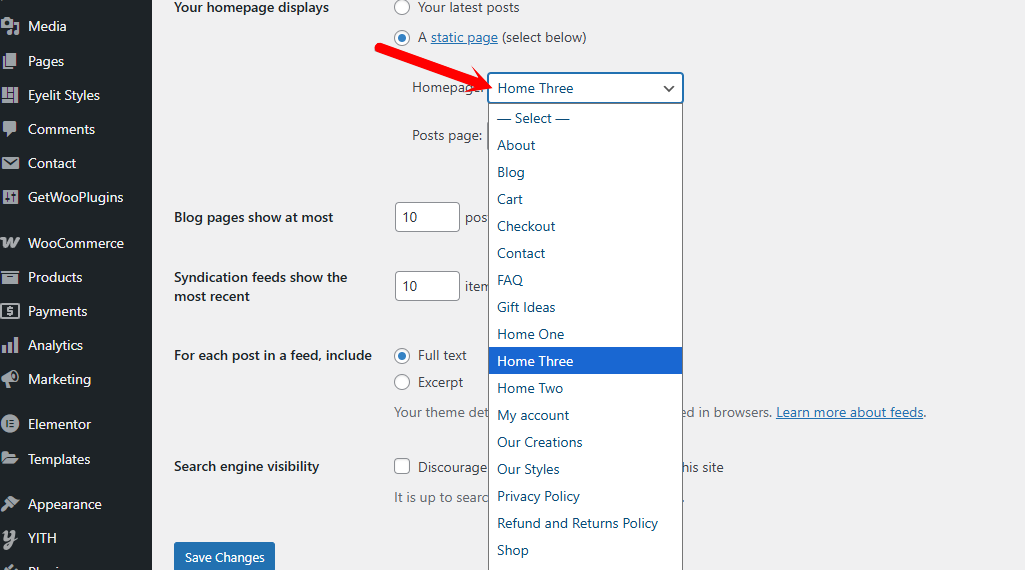
Step 6: Home page
- Select home page: Go to Settings > Reading
- Select Home page (Home One, Home Two, Or Home Three)
The Core Concept: Eyelit Styles
This is the heart of the Eyelit theme. You don’t just sell products; you sell customizable art templates. First, you create design “Styles”, then you attach those styles to a WooCommerce product to make it personalizable.
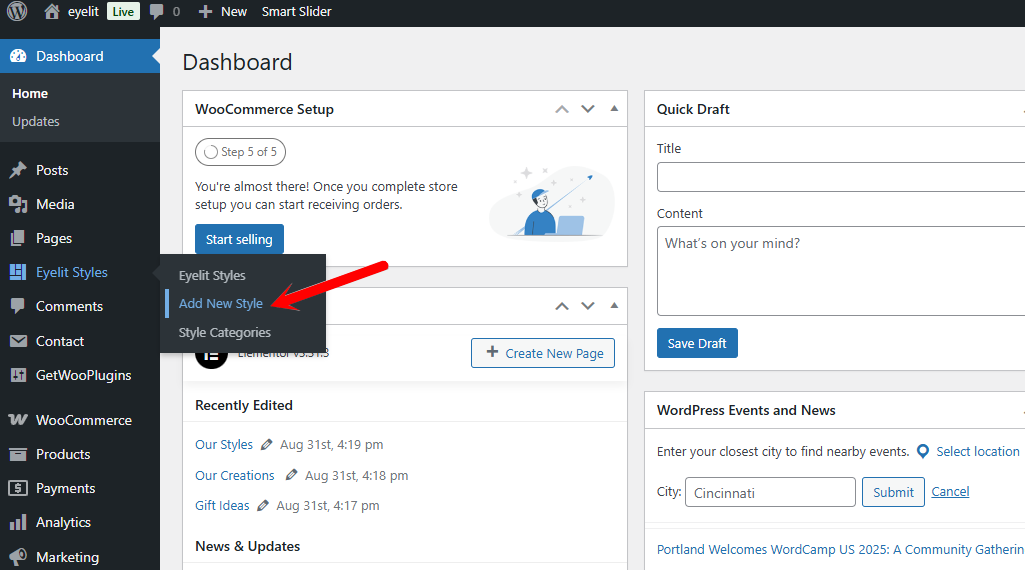
Step 1: Create Your Art Styles
- In your WordPress admin, go to Eyelit Styles > Add New. This is a special post type for your designs.
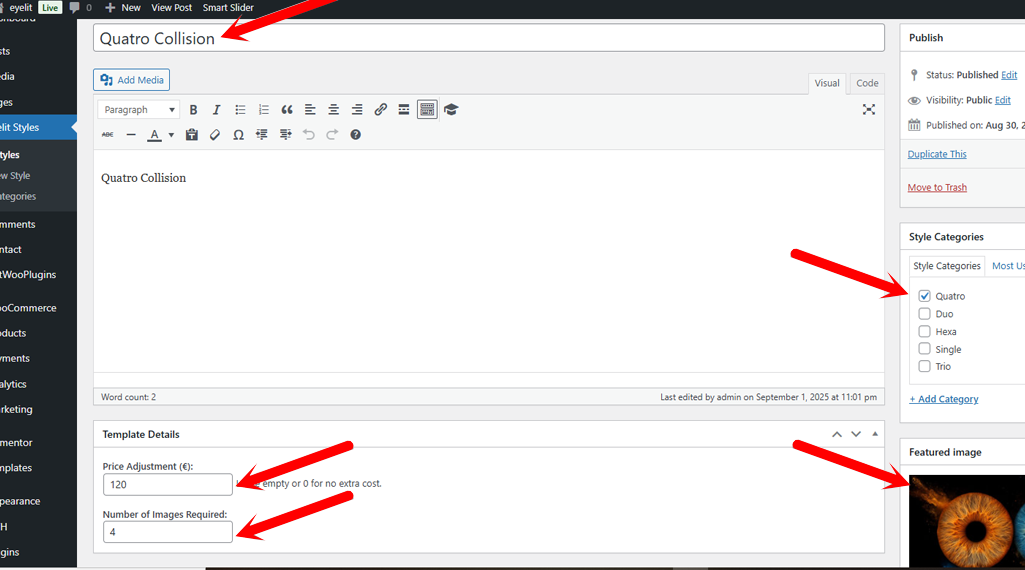
- Give your style a title (e.g., “Galaxy Fusion Duo” or “Minimalist Solo”).
- In the “Template Details” box, set the **Price Adjustment** (e.g., `10` for a style that costs $10 extra) and the **Number of Images Required** (1 for a solo, 2 for a duo, etc.).
- Set a **Featured Image** to be the customer-facing preview of the style.
- Publish your style. Repeat for all the designs you offer.
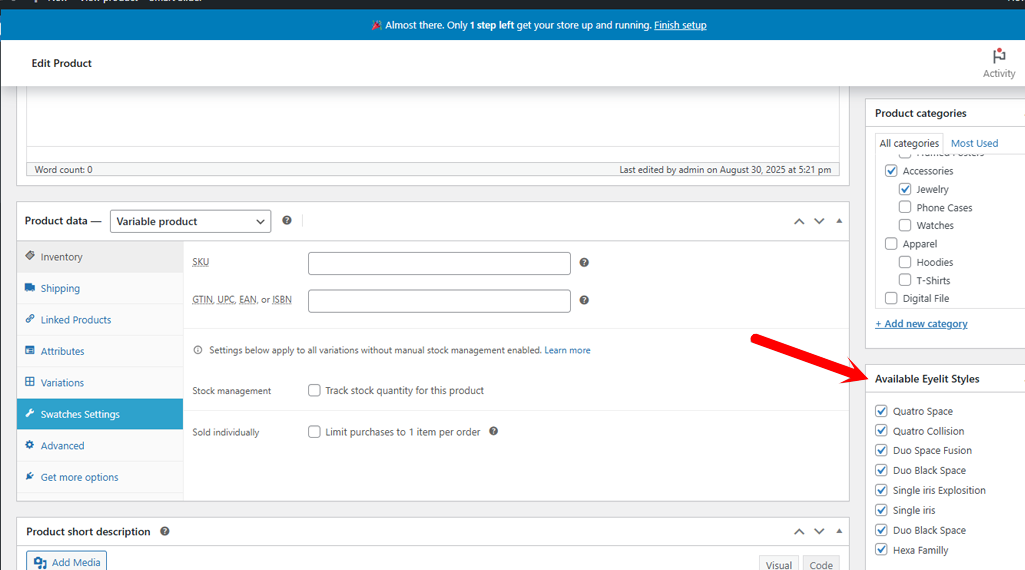
Step 2: Assign Styles to a WooCommerce Product
- Go to Products > Add New or edit an existing product.
- On the right-hand sidebar, find the “Available Eyelit Styles” box.
- Check the boxes for all the styles you want to offer for this specific product.
- Update the product. The product page will now automatically display the full customization interface for your customers.
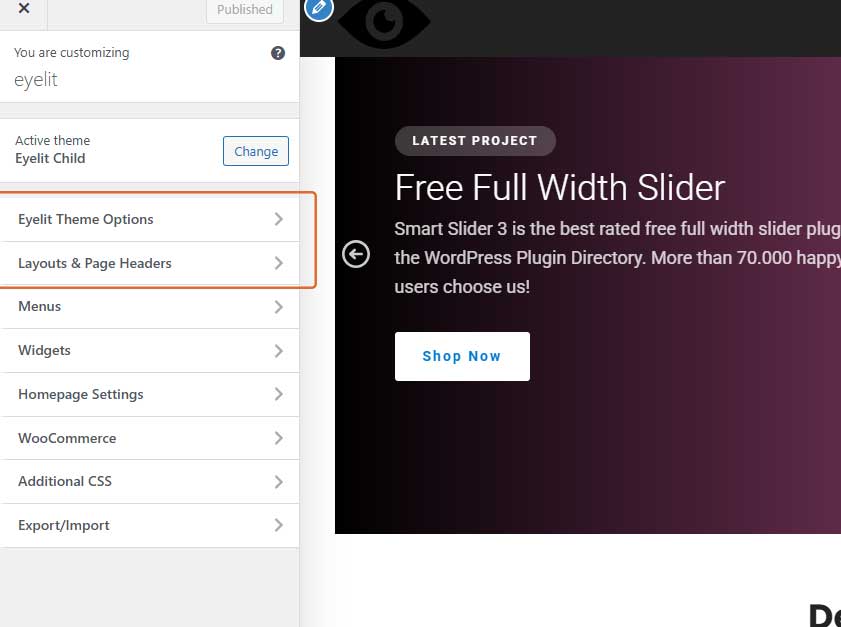
Theme Customization (Global Settings)
All global design options are conveniently located in Appearance > Customize > Eyelit Theme Options. This is your central hub for site-wide design changes. Any setting configured here will apply to your entire site, unless overridden by a Per-Page Setting.
The Customizer provides a live preview of your changes. Don’t forget to click the “Publish” button at the top to save your work.
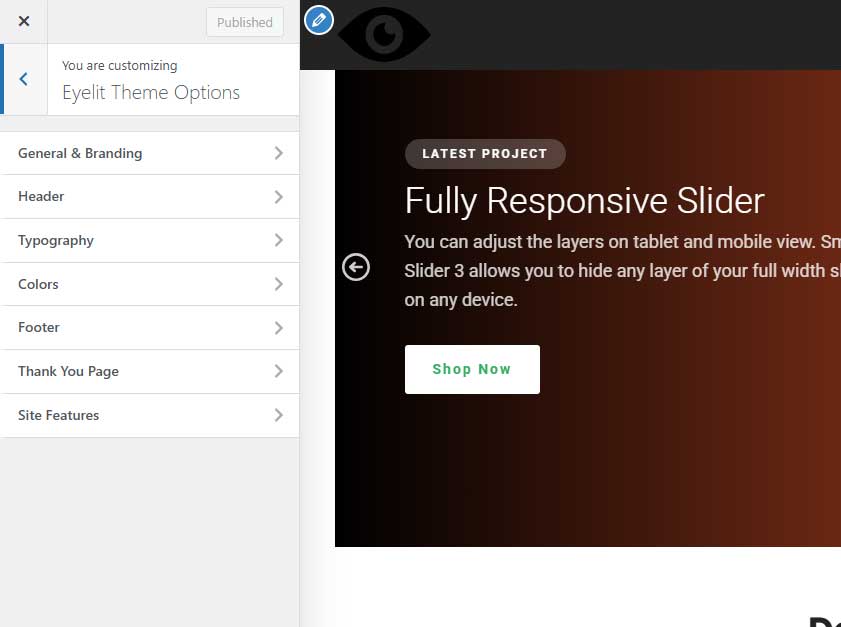
General & Branding
This section controls the core identity of your site.
- Logo: Upload your standard (dark) logo.
- Logo – Light Version: Upload a light-colored version of your logo. This will be used automatically when the header is in “transparent” mode over a dark image.
- Site Title & Tagline: Standard WordPress settings.
- Site Icon (Favicon): Upload the small icon that appears in browser tabs.
Header
Fine-tune every aspect of your site’s main navigation area.
- Layout & Visibility:
- Header Layout: Choose from 4 distinct header designs (Logo Left, Logo Centered, Minimal, Top Bar + Main Header).
- Show Icons: Individually toggle the visibility of the Account, Wishlist, and Cart icons in the header.
- Standard Header Colors:
- Background Color: Sets the main background for the header.
- Link Color / Link Hover Color: Control the colors of your menu items.
- Top Bar Background (Style 4): A dedicated color control for the top bar used in Header Layout 4.
- Sticky & Transparent Header:
- Enable Sticky Header: Makes the header “stick” to the top of the screen on scroll.
- Transparent on Front Page: Makes the header transparent before the user starts scrolling (only on the homepage).
- Sticky Background Color & Opacity: Control the color and transparency of the header *after* the user has scrolled down. This creates the popular “frosted glass” effect.
- Sticky Link Colors: Set different colors for your menu links when the header is in its sticky state.
- Off-Canvas Menu (Mobile):
- Background Color: Set the background color for the slide-out menu on mobile devices.
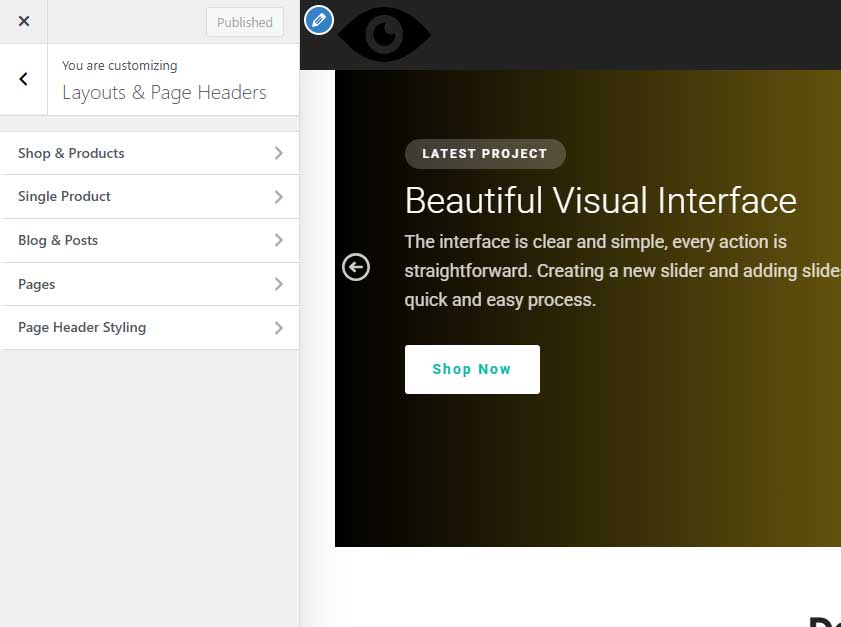
Layouts & Page Headers
This powerful section lets you define the default structure for all major parts of your website.
- Shop & Products: Set the default sidebar position (Left, Right, or Full Width) for all your WooCommerce pages.
- Blog & Posts: Set the default sidebar position for your main blog page and individual articles.
- Pages: Set the default sidebar position for all standard WordPress pages.
- Page Header Styling: Control the global appearance of the large title area that appears below the main menu. You can set a default background image, a fallback background color, overlay color, overlay opacity, and text color.
Typography
Define your brand’s typography with precision.
- Headings & Body Font: Choose from a curated list of high-quality, self-hosted Google Fonts for your headings (H1-H6) and main body text.
- Font Sizes: Control the base font size for the body text, and set a specific font size for each heading level (H1 through H6) individually.
Colors
Establish a consistent color palette across your entire website.
- Primary & Secondary Color: These are your main brand colors, used for buttons, links, and highlights throughout the theme.
- Text & Headings Color: Define the default colors for all standard text and titles.
- Link Color: Set the color for text links.
- Site Background Color: Choose the main background color for your site.
Footer
Customize the bottom section of your site.
- Footer Layout: Choose from 5 unique pre-designed footer layouts.
- Footer Logo: Upload a specific logo to be used in the footer (often a light version).
- Colors: Set distinct background colors for the main footer widget area and the bottom copyright bar. You can also control the copyright text color.
- Copyright Text: Edit the copyright information displayed at the very bottom of your site.
- Social Links: Simply paste the URLs to your social media profiles (Facebook, Twitter, Instagram, etc.), and the icons will appear automatically in supported footer layouts and via the `` shortcode.
Thank You Page
Personalize the experience for your customers right after they complete a purchase.
- Main Title & Subtitle: Customize the main message your customers see on the order confirmation page.
- Timeline Steps (1-5): Edit the title and description for each of the 5 steps in the “What’s Next” timeline, allowing you to perfectly match the process to your production workflow.
Site Features
Toggle extra theme features.
- Show “Back to Top” Button: Enable or disable the floating button that allows users to quickly scroll to the top of the page.
- 404 Page Image: Upload a custom illustration or image to be displayed on your “Page Not Found” error page for a more branded experience.
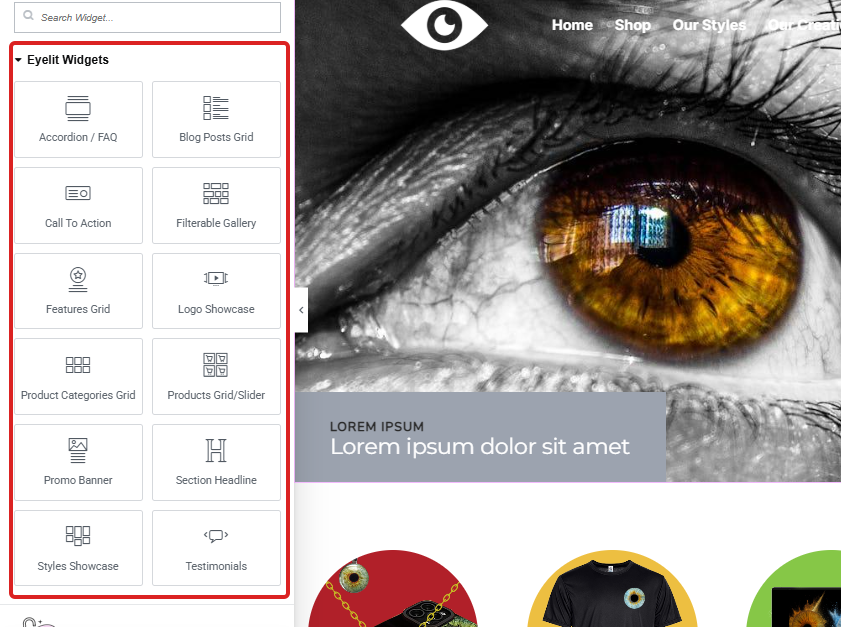
Custom Elementor Widgets
Eyelit includes a powerful suite of 12 custom-built widgets, all neatly organized under the “Eyelit Widgets” category in the Elementor editor. These allow you to build complex layouts with ease.
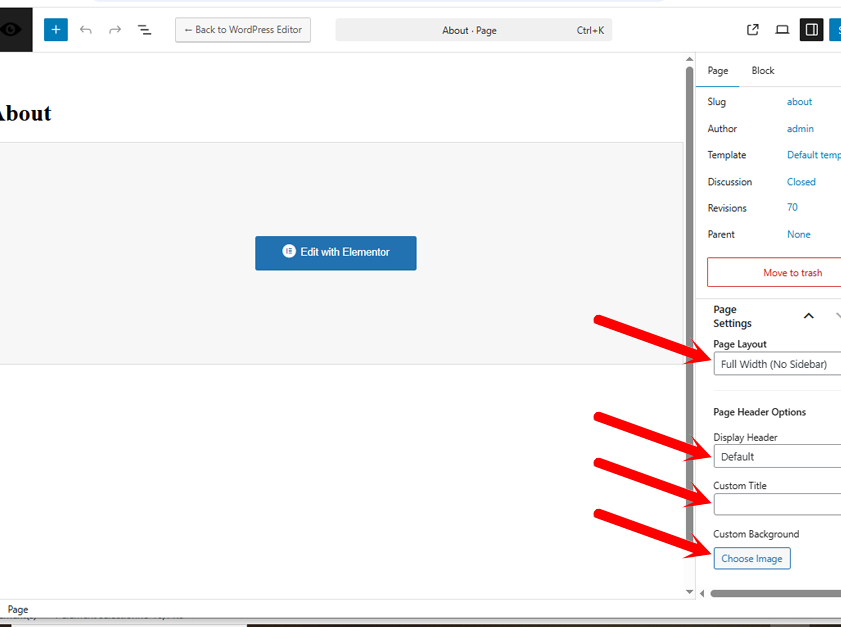
Per-Page Settings (Individual Control)
For maximum flexibility, you can override global settings on any individual Page, Post, or Product.
When editing a page, post, or product, look for the “Page Settings” box in the right-hand sidebar. This allows you to:
- Override Layout: Force a specific page layout (e.g., “Full Width” on a page that is normally with a sidebar).
- Control Page Header: Show or hide the header for just that page, or set a unique background image and title to make it stand out.
FAQs & Troubleshooting
Find answers to common questions and solutions to potential issues below.
Before contacting support, please check these solutions. They resolve over 90% of initial setup issues.
I get an error when uploading the theme or importing the demo!
This issue is almost always caused by insufficient server resource limits. The demo import is a demanding process that requires enough memory and time to complete successfully.
The Solution: The easiest way is to contact your hosting provider and ask them to set the following PHP values for your account. This is a standard request.
memory_limit = 256M(or 512M)upload_max_filesize = 64Mpost_max_size = 64Mmax_execution_time = 300(seconds)
For advanced users, you can try adding these values to your .htaccess or php.ini file.
My customer can’t upload their photo. Is there a size limit?
Yes, the maximum size for an uploaded photo is determined by the upload_max_filesize setting on your server. The recommended value of **64MB** is very generous and should be more than enough for high-quality iris photos from any modern camera or smartphone.
How do I update the theme?
When an update is available, a notification will appear in your WordPress dashboard under Dashboard > Updates. Simply follow the prompts to update. We strongly recommend making a backup of your site before updating.
How do I translate the theme?
Eyelit is fully translatable. The easiest method is to use a free plugin like Loco Translate.
- After installing the plugin, go to Loco Translate > Themes, select **Eyelit**, and add your language.
- Then, go to Loco Translate > Plugins and do the same for **Eyelit Functionality** to translate the widget texts.
How can I improve my site’s speed?
Eyelit is built to be fast. To further optimize performance, we recommend the following:
- Caching Plugin: Essential for speed. We recommend W3 Total Cache (free) or WP Rocket (premium).
- Image Optimization: Crucial for an image-heavy site. Use a plugin like Smush to compress images automatically.
- Database Optimization: A plugin like WP-Optimize can help keep your database clean and efficient.
Child Theme & Advanced Customization
For Advanced Users: If you plan to modify the theme’s code files (PHP, CSS, or
JS), you **must** use the provided child theme (eyelit-child.zip). Otherwise, your
customizations will be permanently lost when you update the main theme.
Support
Thank you again for your purchase. If you have any questions that are beyond the scope of this documentation, please feel free to contact us through our support channels on the marketplace where you purchased the theme.